How to Write a Creative Brief for AI Ads
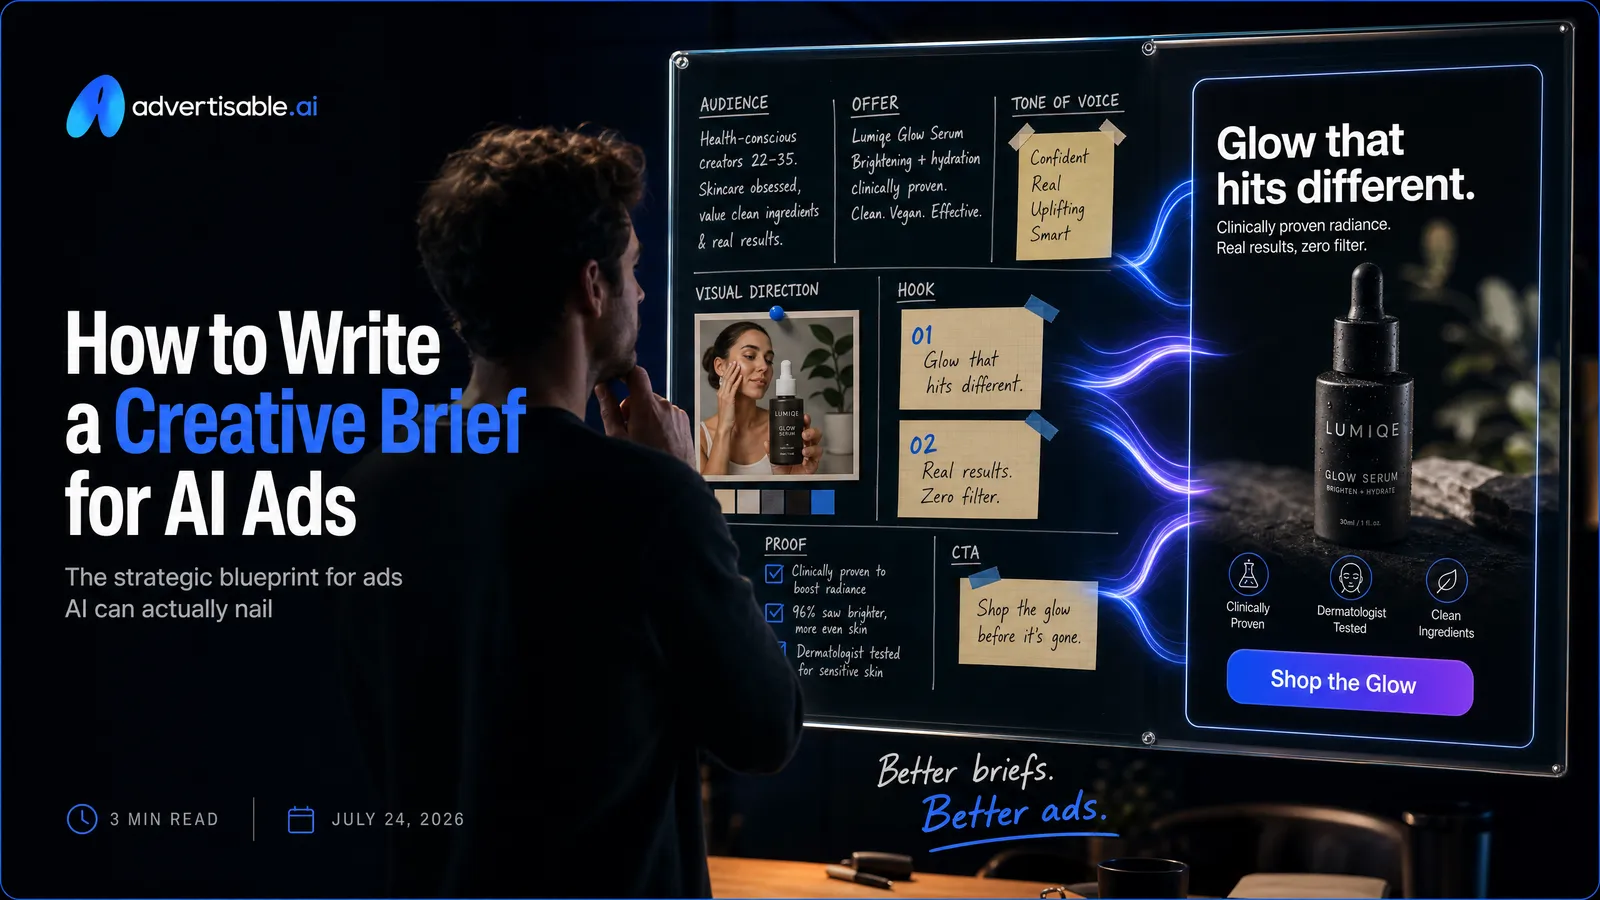
A creative brief for AI ads should include one objective and success metric, the audience and insight, the offer and CTA, hook rules plus 10-20 hook prompts, a fixed creative anatomy (hook, product moment, proof element, CTA), brand and claims guardrails, and exact deliverables by channel.
Here’s what matters most right now:
- Write for controlled testing: lock anatomy, then vary one independent variable at a time.
- Define the dependent metric up front: thumb stop, CTR, or CVR, not “better creative.”
- Make the hook a spec: one clear promise in the first 1-2 seconds.
- Require an early product moment so the ad stays honest and recognizable.
- Pick one proof element type per ad so you can QA claims fast.
- Set brand and claims guardrails so AI does not invent features.
- List channel deliverables explicitly (Meta, TikTok, YouTube) to stop format churn.
- Lock the brief in a 20-minute kickoff, then treat changes as scoped requests.
We built Advertisable AI because performance teams were stuck in a production and iteration bottleneck: too many variations to ship, not enough control to keep them accurate. In Advertisable AI Studio, you can import a product URL to extract Brand DNA, approve a storyboard-first structure before rendering, then use scene-level regeneration to fix only the weak beat instead of redoing the whole ad.
The fastest way to reduce revisions is to stop treating the brief as campaign background and start treating it as gap removal: every line should eliminate an assumption a human would infer and an AI would average.
Reframe the creative brief for ads as gap removal
A creative brief for AI ads is not a vision statement. It is a control document that removes the gaps where interpretation, drift, and generic outputs happen.
Humans interpret, AI averages
A human creative team can infer intent from a messy brief. An AI system will typically produce the safest average of what you asked for, because it cannot read between the lines the way a senior creative or editor can.
In practice, that means your brief needs to function like production constraints: what must be true in every version, what is allowed to vary, and what is explicitly disallowed. When you write “make it punchy” or “make it premium,” a person can translate that into pacing, word choice, and visual language. A model translates it into generic cues it has seen a thousand times.
- Your job: define the dependent metric (for example, CTR or CVR) and the one variable you are testing first (often the hook in the first 1-2 seconds)
- AI’s job: generate options that fit those constraints without inventing new claims or changing the creative anatomy
- Acceptance criteria: the hook, product moment, proof element, and CTA are all present, in that order, within a 5-60 second structure
Why vague briefs create generic ads
Vague brief in, generic ad out is not a moral failure of the tool. It is a missing-spec problem: you did not remove enough ambiguity for the output to be specific, testable, and on-brand.
When the request is “make 10 video ads,” the model has no basis for choosing a distinct hook promise, what the product is within the first few seconds, or what proof it is allowed to use. The result is interchangeable copy, default pacing, and scenes that could sell anything.
To remove the gap, specify what stays constant across a batch and what changes. Then you can run single-variable batches, read results in 48-72 hours, and make a clean next-test decision instead of debating subjective taste.
- Bad input: “UGC-style ad for Meta, highlight benefits, include strong CTA”
- Better input: “Generate 15 hook variants only; keep body scenes 2-4 identical; product moment by second 3; proof must be a demo or a sourced statistic; CTA line fixed; no new claims beyond the landing page”
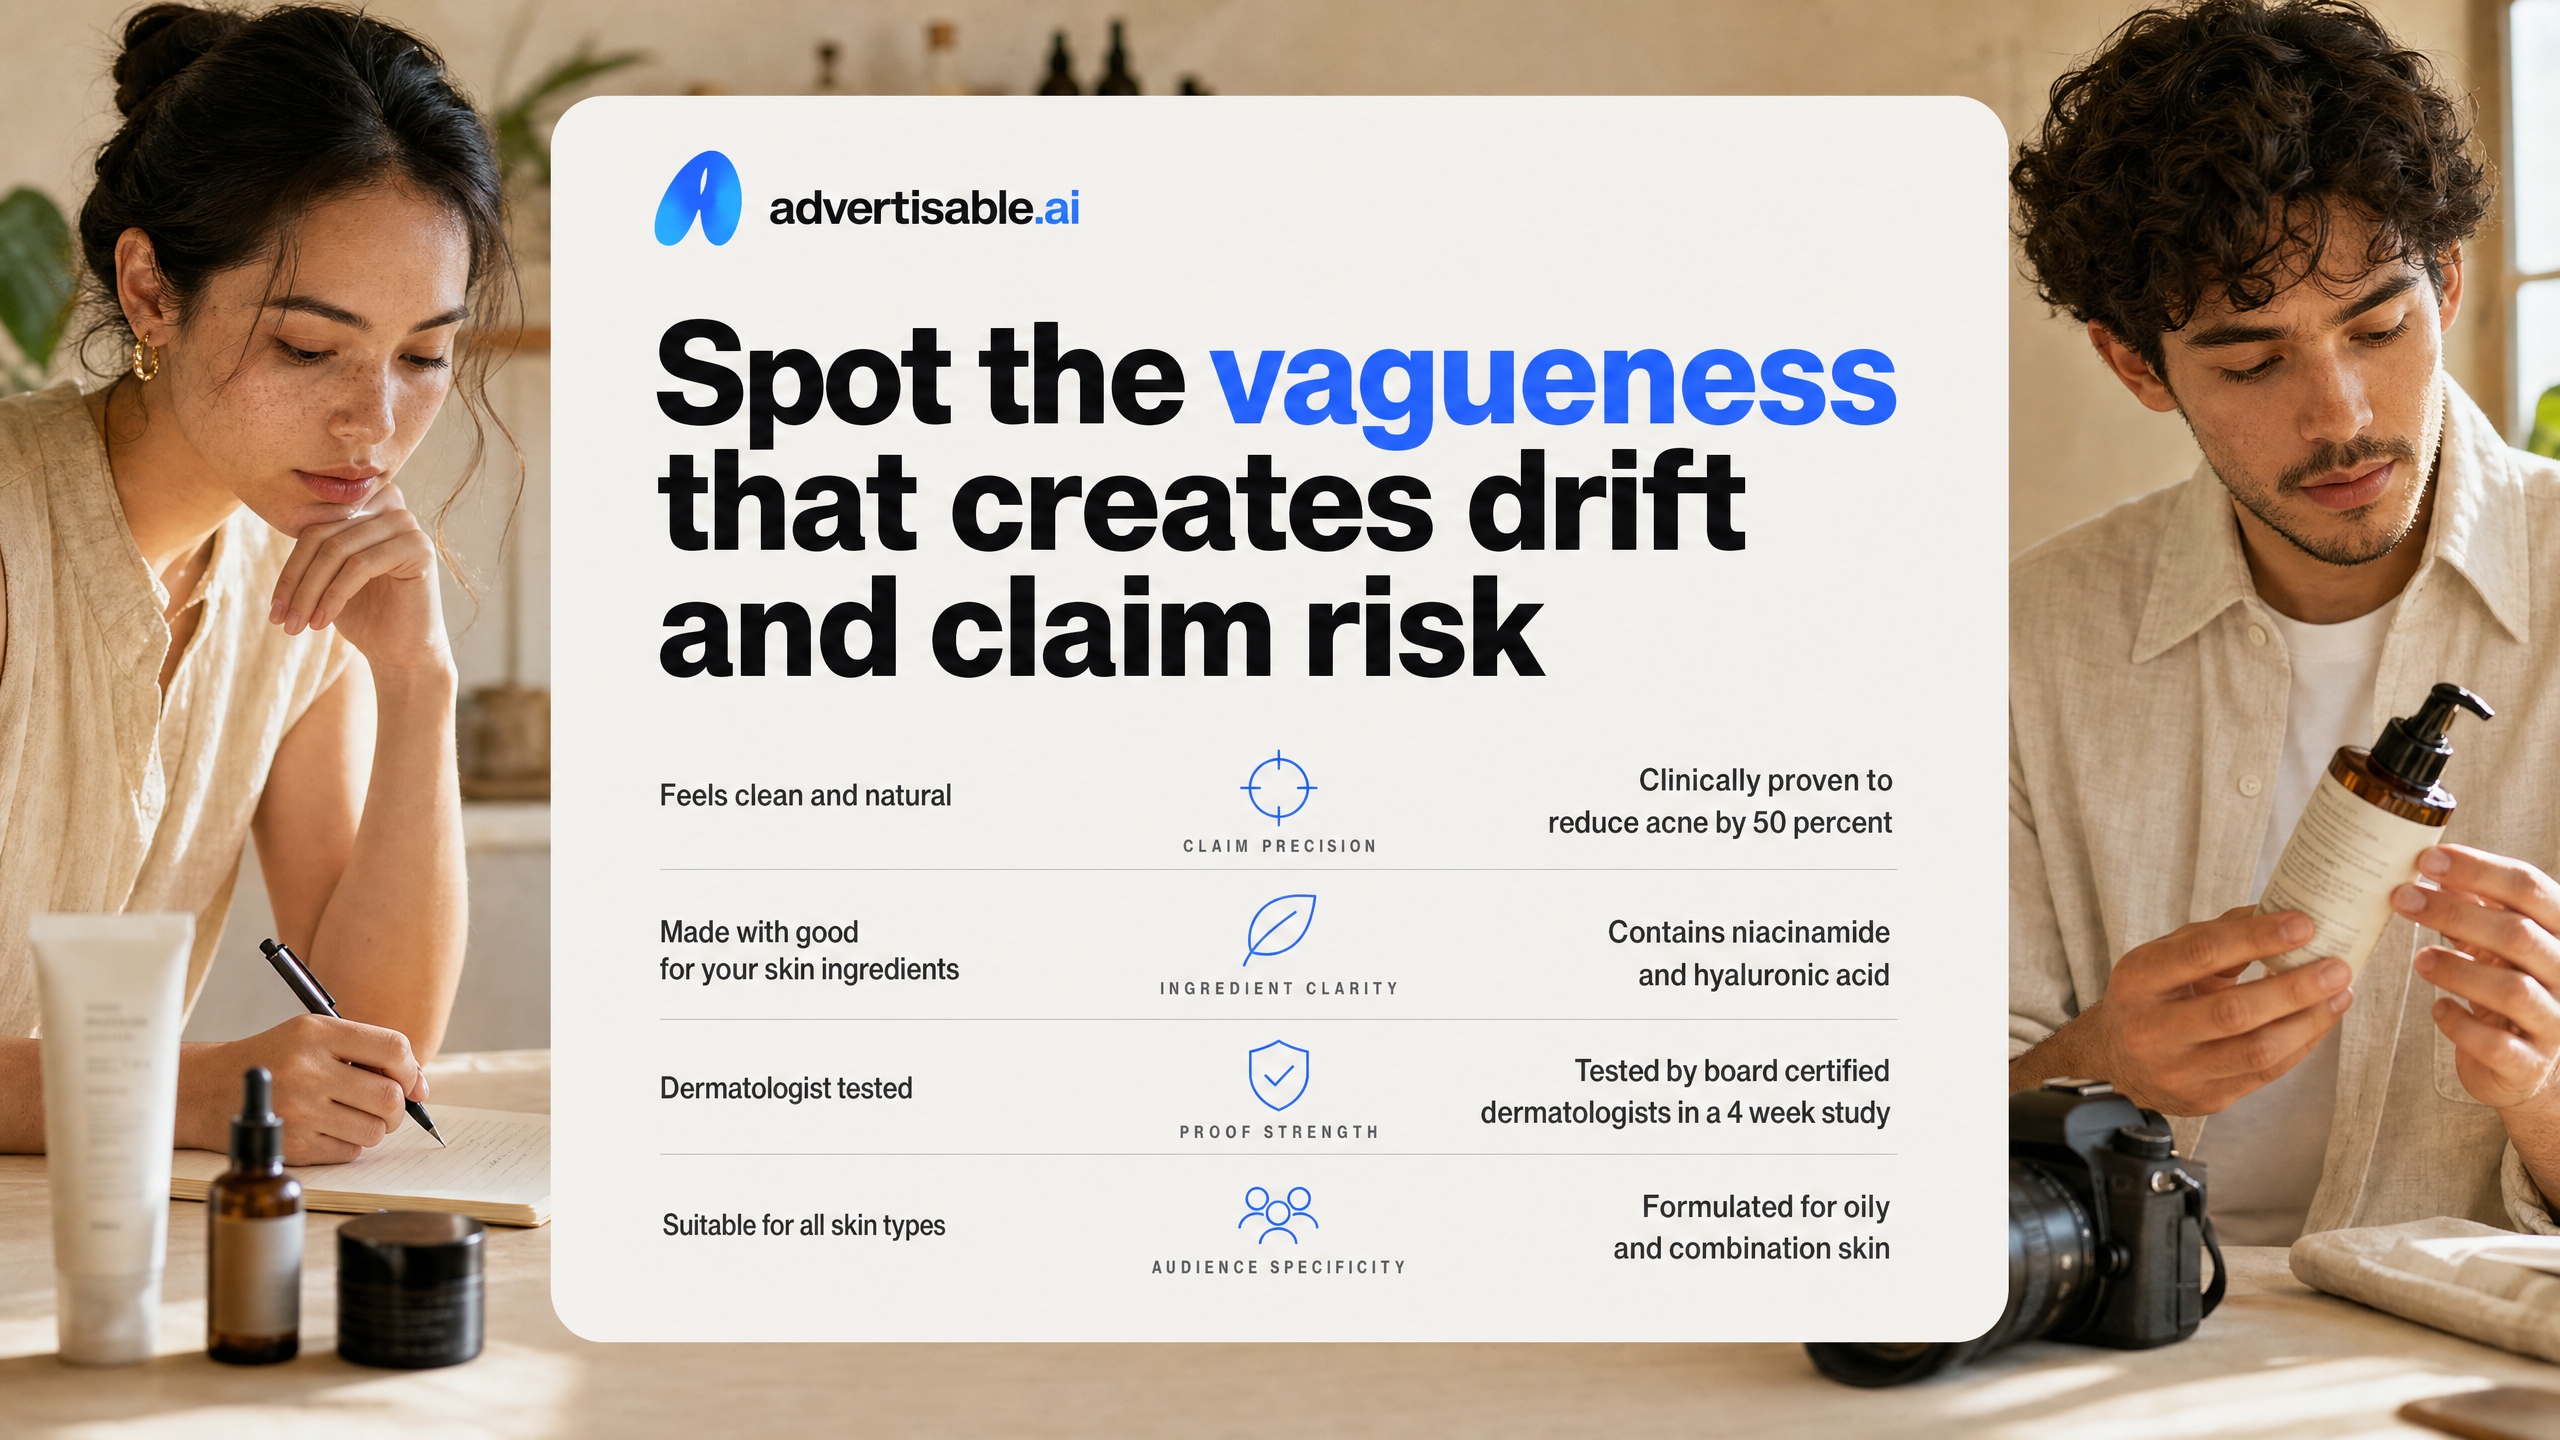
Spot the vagueness that creates drift and claim risk
Abstract Benefits vs. Product Truth
Abstract wins like “build trust” or “boost conversions” are not brief inputs, they are outcomes you measure after launch. When they replace product truth, your team fills the gap with generic promises, and the ad drifts away from what the landing page can actually support.
Write the brief so the hook and proof are constrained by reality. You should be able to point to the exact sentence on the product page (or internal doc) that supports every express or implied claim, consistent with the FTC advertising substantiation policy.
- Replace “highlight quality” with 1-2 concrete attributes you can show on-screen (material, form factor, compatibility, what is included)
- Define the proof type you will allow: demo, testimonial line, or a specific statistic you can verify
- Add claim guardrails: 1-2 allowed claims and 1-2 disallowed claims (things the model must not invent)
When “On-Brand” Becomes Empty Adjectives
“On-brand” fails when it is only adjectives like premium, bold, playful, clean. Those words do not tell a generator, editor, or agency what to hold constant across 10-20 variations.
Translate tone into production guardrails and acceptance criteria you can QA in 60 seconds before export. This is how you prevent drift while still letting hooks vary in single-variable batches.
- Do: specify what must appear in the first 2 seconds (product visible, readable sound-off text, no slow logo intro)
- Do: define a fixed anatomy order (hook, product moment, proof element, CTA) and what each beat must contain
- Do: set visual constraints (approved colors, fonts, logo size rules) plus “never show” exclusions
- Don’t: approve a script that could sell five different products without changing nouns
Is Your Audience Missing a Real Objection?
An audience section that only lists demographics creates weak creative because it does not tell you what the viewer is pushing back on. Without a real objection, your proof element turns into filler and you cannot explain why performance moved within a 48-72 hour readout.
A usable audience note includes one persona plus one friction point that the ad must answer in a single sentence, then you decide where it lives: hook, product moment, or proof.
- Name one objection you will address: “I don’t believe it works,” “I don’t get what it is,” “It seems overpriced,” or “It won’t fit my setup”
- Map the objection to one beat only, so your test stays attributable
- Define the dependent metric you expect to move (thumb stop, CTR, or CVR) before you ship variations
Make the AI brief explicit where humans would infer
Product Truth vs. Product Moment
Product truth is what is objectively true about the product. The product moment is the exact beat in the ad where you show that truth on screen so the viewer can verify it in 1-3 seconds.
Humans will infer missing details from context. AI will often fill gaps with plausible-sounding invention unless you pin it down. In your brief, write the product truth as one sentence, then specify the product moment as a concrete visual: what is in frame, what text appears, and what the viewer learns by second 3.
Acceptance criteria: by second 3, a first-time viewer can answer “what is it?” without guessing, and the product shown matches your landing page.
- Product truth (1 sentence): what it is, who it is for, and the primary outcome it supports
- Product moment (timestamp): “0:02-0:03 show the product in hand + on-screen label; voiceover names the core use case”
- Hold constant for testing: keep the product moment identical across 10-20 hook variants so your 48-72 hour readout is attributable
What Is the One Promise, and What Proof Type Backs It?
You need one promise per ad. Pair it with one proof type so the AI does not stack multiple claims and muddle the message.
Write the promise as a single measurable outcome or job-to-be-done. Then choose the proof type you will allow in the brief (demo, testimonial line, or specific statistic). This is where Anthropic's prompt engineering research matters in practice: explicit constraints reduce back-and-forth and keep outputs usable at scale.
- Promise (one line): “Get X outcome in Y context”
- Proof type (pick one): demo, testimonial line, or statistic (only if you can verify it)
- QA check: the proof supports the promise directly, and no second promise appears in the hook or CTA
Claim Boundaries and Disclaimers
Claim boundaries tell the model what it can say, what it cannot say, and what must be qualified. This prevents compliance risk and protects conversion quality by matching the ad to what the landing page can deliver.
Define boundaries as “allowed claims” and “disallowed claims,” then add any required disclaimers as exact copy. Keep these locked while you vary only one creative variable, otherwise your test results are confounded.
- Allowed claims (1-2): exact phrases the ad may use
- Disallowed claims (1-2): anything that would require substantiation you do not have
- Required disclaimers (verbatim): where it appears (on-screen text, voiceover) and minimum on-screen duration (for example, 2 seconds)
Split the brief into brand-level constants and per-ad variables
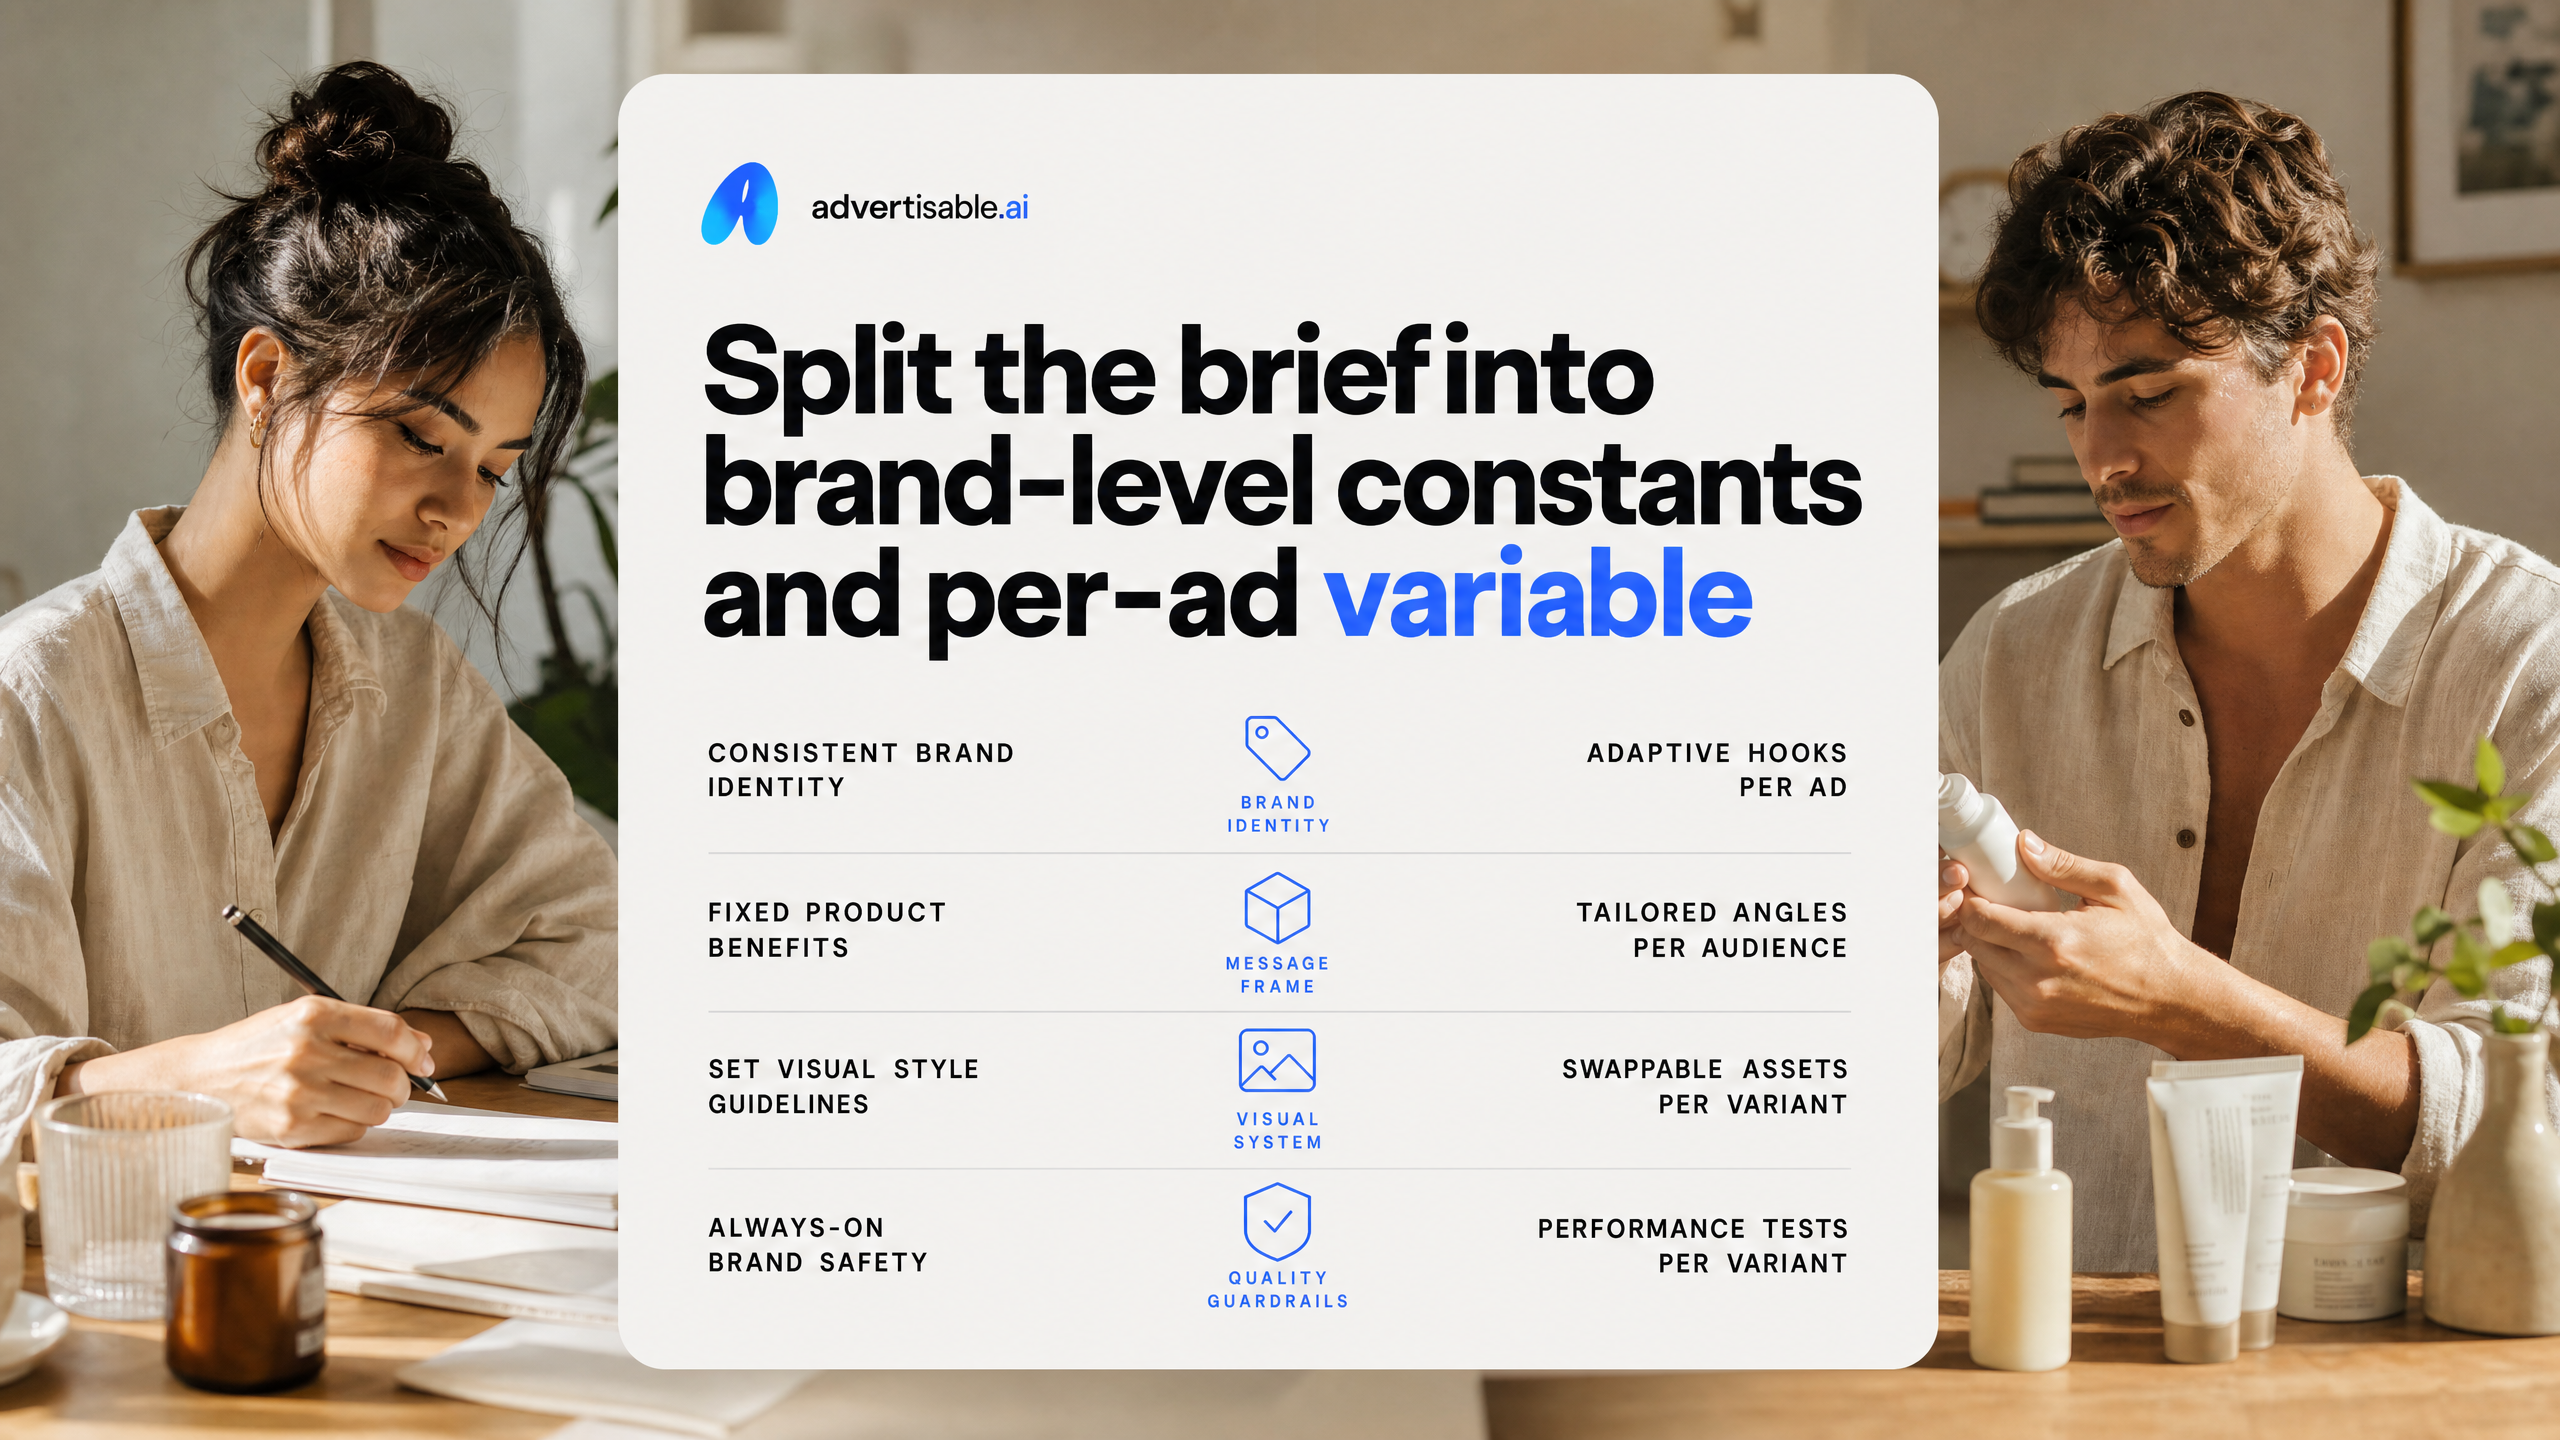
What stays constant across ads?
Your constants are the guardrails that make results attributable and keep output on-brand. Lock them once per campaign, then reuse them across every variation so you are not re-solving the same decisions 20 times.
In practice, we treat constants as anything that should not change during a 48-72 hour readout window because it will contaminate the learning. It also prevents the output drift you get when guardrails are loose and every batch quietly redefines the brand.
- Objective metric and decision rule: one primary metric (CTR or CVR) plus a kill/keep threshold you commit to before spend lands
- Fixed creative anatomy: hook, product moment, proof element, CTA in the same beat order
- Offer and CTA intent: same price/promo and the same action (Shop now, Start trial)
- Claims and compliance rules: allowed claims, disallowed claims, required disclaimers
- Brand DNA basics: approved colors, fonts, logo use, and tone, plus what “off-brand” looks like in one sentence
- Production specs: aspect ratios and export requirements (9:16, 1:1, 16:9) so you do not re-edit for every channel
What changes each time?
Your variables are the single elements you rotate to learn what actually moved performance. Change one variable per batch, otherwise you cannot explain why one ad won or reproduce it.
Start with hook variants because the first 1-2 seconds drive thumb stop and determine whether the rest of the ad even gets seen. Keep the body beats identical while you run 10-20 hook prompts, then read performance after 48-72 hours.
When you need to iterate fast, scene-level control matters more than full rewrites. In Advertisable AI Studio, you can lock Brand DNA and storyboard structure, then regenerate only the weak beat (often the first frame or the proof scene) without touching the rest.
- Hook line and first frame: promise, pattern interrupt, headline text, opening visual
- Proof format: demo vs testimonial line vs one verifiable statistic (same claim guardrails)
- Product moment presentation: angle, close-up vs in-use, packaging vs UI, while keeping what it is and does consistent
- CTA packaging: same action, different wording length or on-screen treatment for readability
- Editing micro-choices: pacing, captions density, and transition type, tested one at a time
Write the one-page per-ad brief for controlled testing
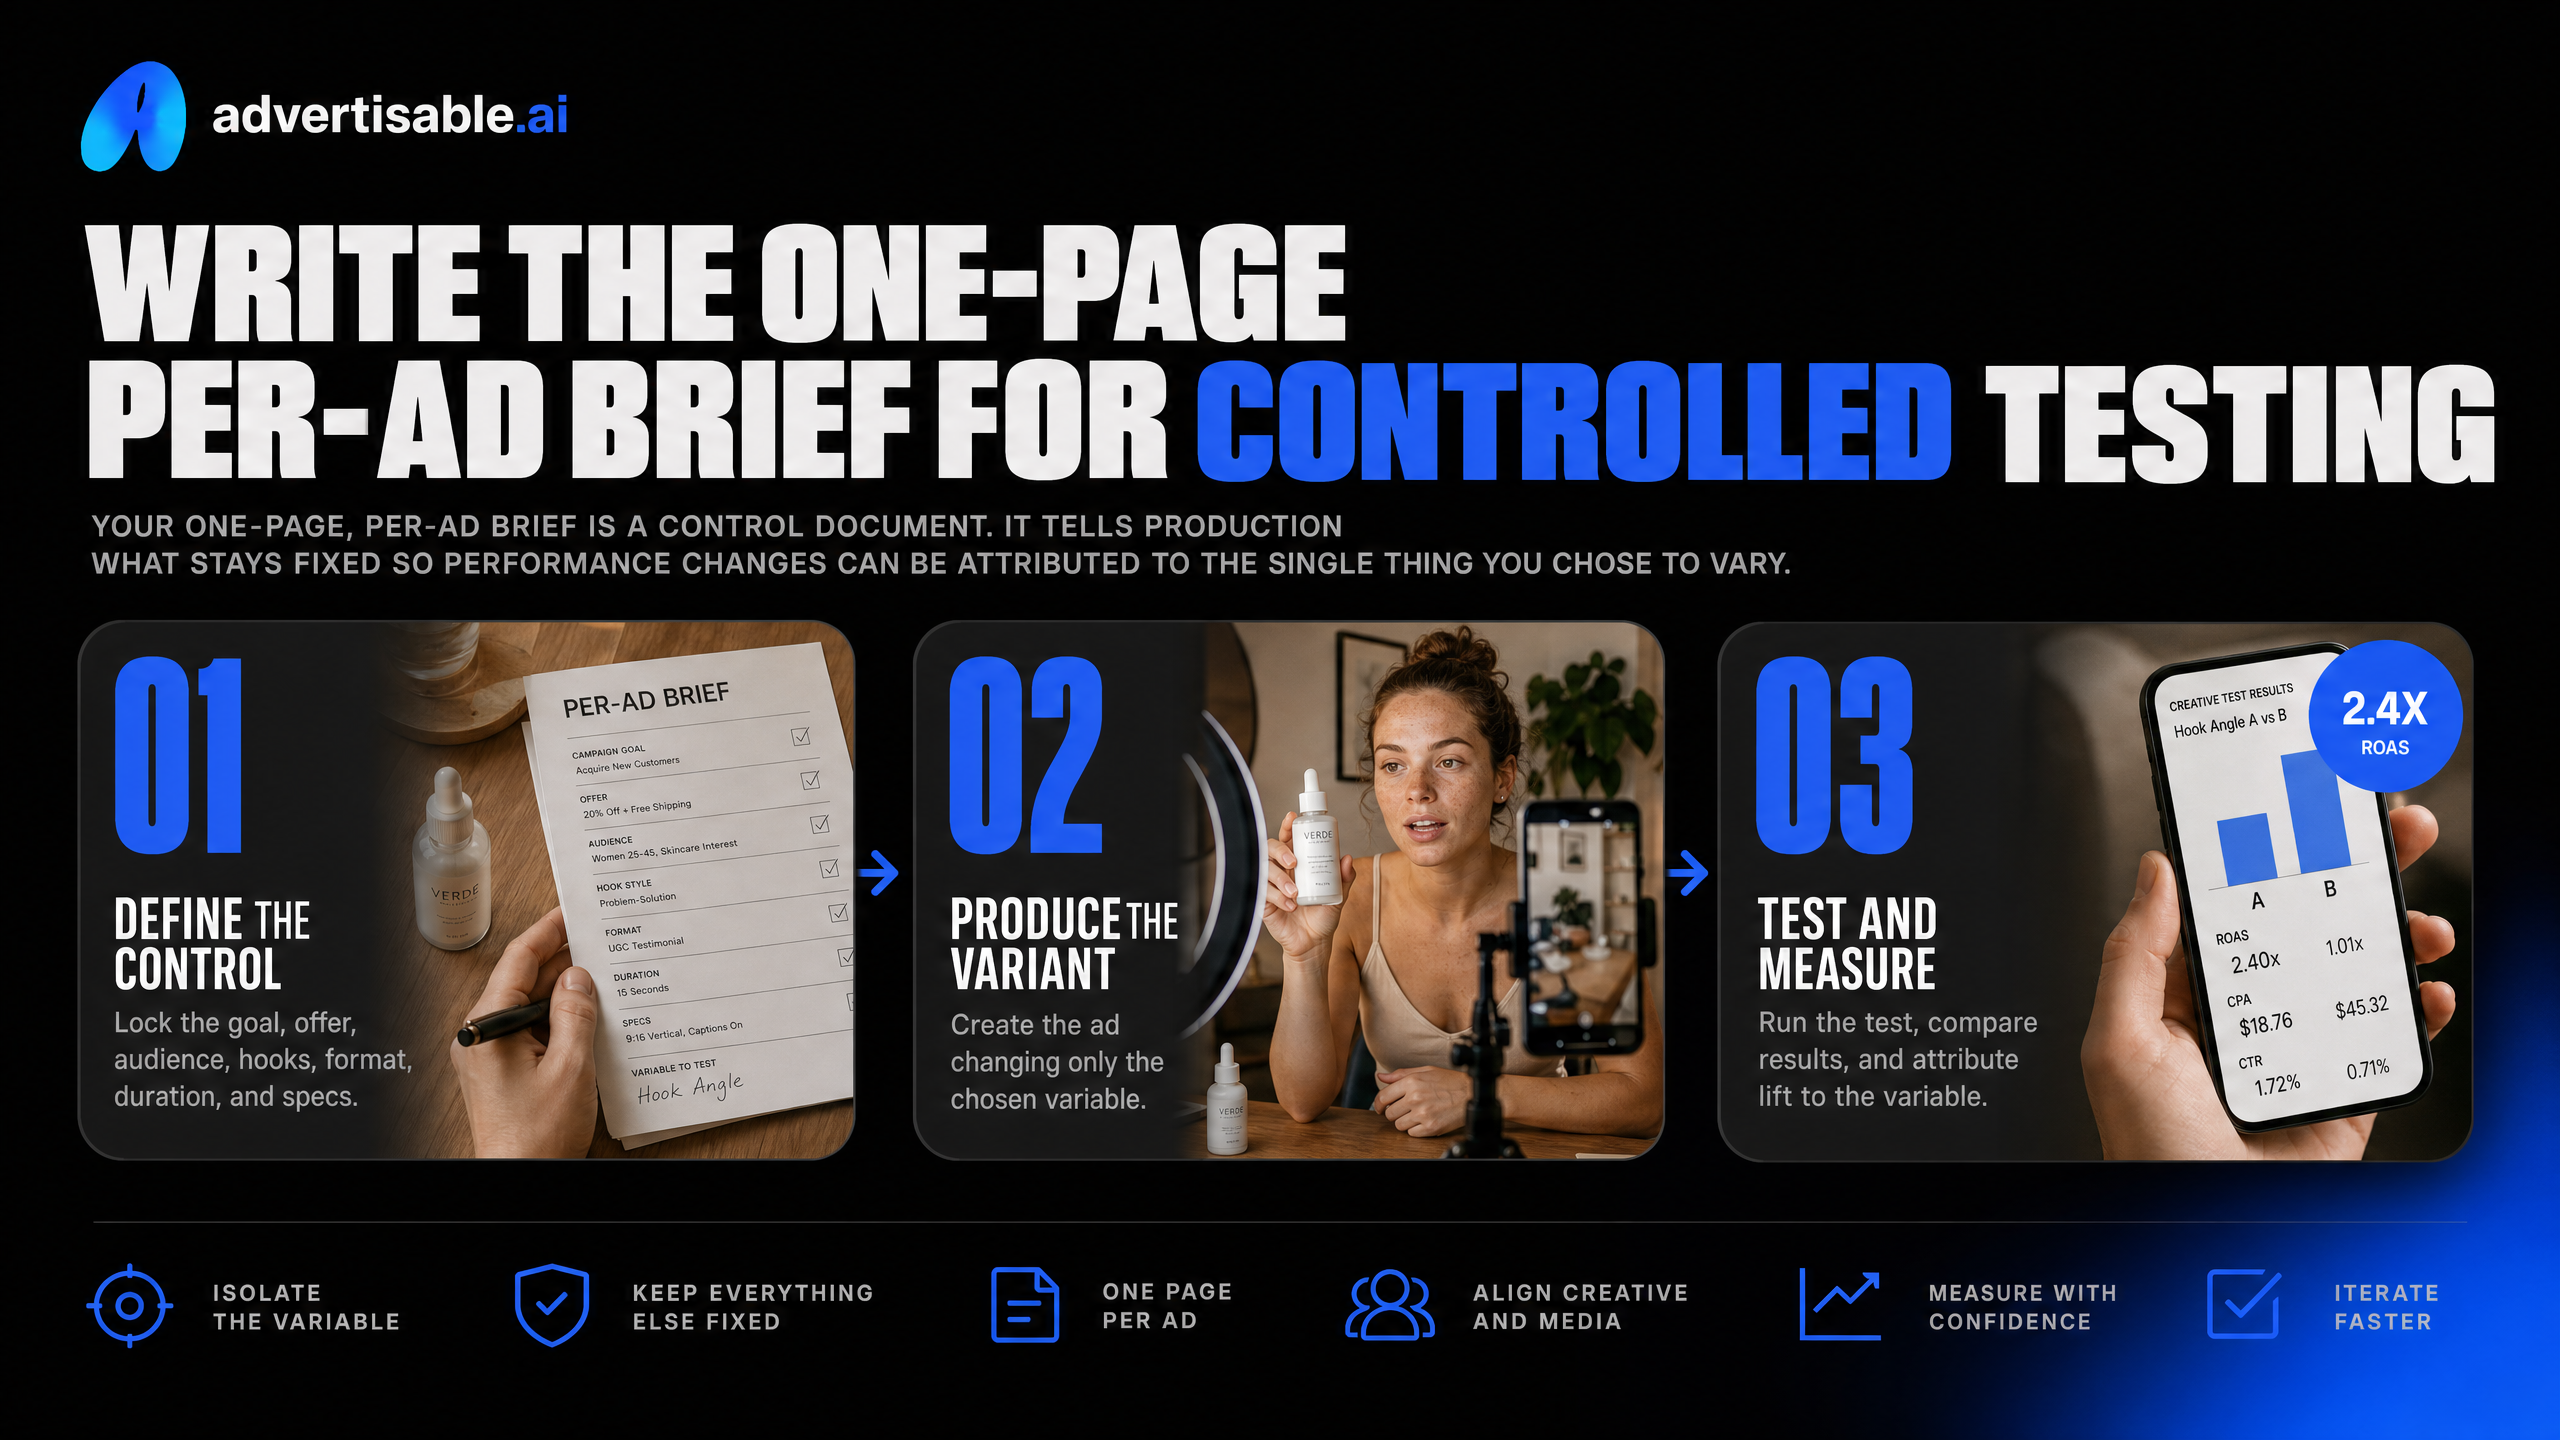
Your one-page, per-ad brief is a control document. It tells production what stays fixed so performance changes can be attributed to the single thing you chose to vary.
Lock the four beats
Lock the four beats before you write any variations: hook, product moment, proof element, CTA. If these drift across versions, you do not know what caused the result change, and you cannot reproduce it.
Write each beat as a single, testable instruction, not a paragraph. The acceptance criteria is binary: a reviewer can watch the storyboard and say “yes, that beat happened” within the first pass.
- Hook (seconds 0-2): one clear promise plus a pattern interrupt, written as 8-12 words of on-screen text or the first VO line
- Product moment (by second 3-5): the product is visible and accurately named, with one concrete “does” statement that matches the landing page
- Proof element (one unit): choose exactly one type (demo, testimonial line, or specific statistic) and define what counts as “verifiable” for your team
- CTA (final 1-2 seconds): one action, one destination, one phrasing (no alternating CTAs across variants)
How do you generate hooks without changing the body?
Generate 10-20 hook variants while holding the body constant, including the product moment, proof, and CTA. That makes your readout attributable, which is the whole point of a controlled test.
In the brief, label the hook as the only independent variable, then lock the body as a “do not edit” block. If you are using a storyboard workflow, you should be able to swap only Scene 1 and keep Scenes 2-4 identical.
- Hook prompt format: [audience] + [pain] + [promise] + [contrast angle], with a hard limit of 1 idea per hook
- Guardrail: no new claims, no new offers, no new proof types introduced in the hook
- QA check: hook promise must be paid off by the fixed product moment within 3-5 seconds
Pressure-test the brief in 20 minutes
You can pressure-test a per-ad brief in 20 minutes by forcing decisions and deleting ambiguity. The output is a “locked” brief that stops mid-production scope creep.
Run a tight read-through on the storyboard: can every stakeholder point to the same hook promise, the same product reveal, the same proof, and the same CTA? If not, you do not ship variations yet.
- Minutes 0-5: confirm the single success metric and the 48-72 hour readout window you will use to judge it
- Minutes 5-10: read each of the four beats out loud; any sentence with “and” becomes two options, pick one
- Minutes 10-15: claims and proof audit; anything you cannot substantiate is removed or rewritten
- Minutes 15-20: lock what varies (only the hook), who approves changes, and what triggers a next test versus a full reset
If you can leave that meeting with one locked page and 10 hook prompts, production can move without interpretation debates.
Operationalise the two-part brief in Advertisable AI Studio
How Do You Define Brand DNA Once From a URL?
You define Brand DNA by importing a single product page and treating it as the source of truth for what the ad is allowed to say and show. Do it once per product or offer, then reuse it across every batch so your hooks can vary without the brand drifting.
In practice, we use the URL import to pull the product facts and the brand cues you would otherwise restate in every creative brief. Your acceptance criteria is simple: the extracted facts match the landing page, and the claims you will test are explicitly allowed while anything risky is explicitly disallowed.
This matters operationally because a batch is only a batch when the guardrails stay fixed. It is the difference between generating 20 ads from one prompt and generating 20 different interpretations of your business.
- QA check: product name, price or offer framing, and core promise are accurate to the page
- QA check: 1-2 approved claims are written in plain language, plus 1-2 disallowed claims you never want generated
- QA check: brand basics are locked (logo usage, colors, typography cues, tone constraints)
- Decision rule: if any item fails, fix Brand DNA first, then regenerate. Do not patch it scene-by-scene.
Approve the Storyboard Structure Before You Render
Approve structure at the storyboard stage, before you render video, so you catch anatomy problems when changes are cheap. For performance ads, you are approving the sequence of beats, not debating polish.
We look for a clean arc in under 60 seconds: hook in the first 1-2 seconds, an early product moment, one proof element, then a single CTA. The goal is export readiness with controlled variation, not endless rewrites.
Run one-variable batches: keep the body, proof, and CTA constant, then generate 10-20 hook variants. Give each batch a 48-72 hour readout window in-platform before you change anything else.
Only after the structure is approved do you render in Advertisable AI Studio, then use scene-level regeneration to replace the one weak beat instead of redoing the entire ad.
- Structure pass: each beat is present once (hook, product moment, proof, CTA) and the product appears early
- Clarity pass: first frame is readable sound-off, and the hook makes one clear promise
- Compliance pass: proof is verifiable and aligned to your allowed claims
- Test readiness: independent variable is defined (for example, hook angle), and everything else is held constant
Turn your one-page brief into controlled ad output
If your brief reads like a novel, it still gets ignored and your production drifts. The fix is operational. You lock the ad anatomy, then you test one variable at a time.
Copy the one-page template from this article, then run it through Advertisable AI Studio. Paste your product URL, let our Brand DNA Module extract what must stay true, then lock your claims guardrails before you generate anything. Approve the storyboard first so structure is correct, then render.
From there, ship single-variable batches: 10 to 20 hook variations with the body held constant. Review performance after a 48 to 72 hour readout. Regenerate only the weak beat at the scene level, then export ready-to-launch assets for Meta and TikTok.
Frequently Asked Questions
### Why do mixed batches fail to teach me anything about my ads?
Because you changed more than one thing, you cannot attribute the performance change to a specific beat. Hold the creative anatomy constant and vary one independent variable per batch so your next test decision is obvious.
### What are the four beats of creative anatomy and why does each matter?
Hook earns the pause, product moment proves what it is, proof makes the promise believable, and the CTA gives one clear next step. When you lock those beats, you can isolate what actually moved thumb stop, CTR, or CVR.
### How do I know if my AI ads look generic or off-brand?
If the first frame and copy could sell any product, you are missing specificity and guardrails. Lock Brand DNA and claims upfront, approve the storyboard before rendering, then use scene-level edits to fix only the beat that is drifting.